Read the review from Andrew Thurow on Google
Positive: Professionalism, Punctuality, Quality, Responsiveness, ValueJustin K. was the technician dispatched to me. He was extremely courteous and professional, and helped me with each of the issues I was facing. He explained everything in detail and answered all our questions and helped us choose the most cost effective fixes and made sure things were done right and thoroughly. First time using this company and definitely will again!! Thanks Justin!
Service call took place in NE Palm Bay. Work customer requested (outlet for microwave has no power. Reset GFCI and breakers, but still isn’t working) Work we did 02.03 Diagnostic
What we did:
-
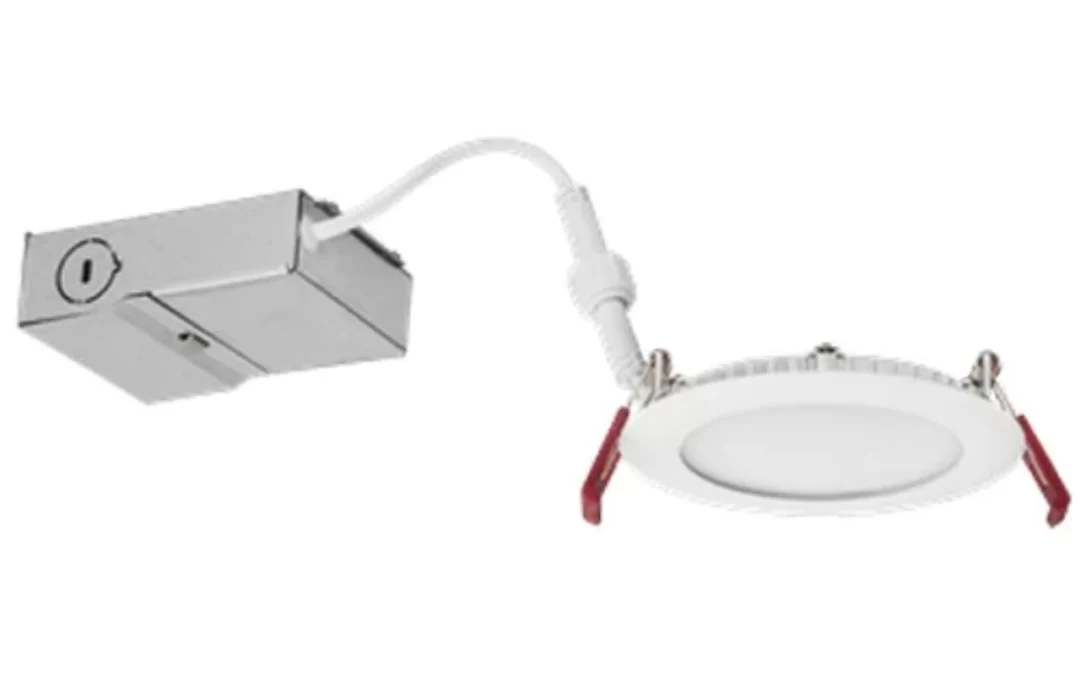
- Troubleshoot flickering lights in the master bath
- Replace the bad 6” wafer light in the master bathroom with a new one
- Troubleshoot arc fault living room circuit tripping
- So, you’re experiencing some flickering lights in your master bath? Don’t worry, it’s a common issue that many homeowners face. The first thing you’ll want to check is if the problem is isolated to just one or all of the lights in the bathroom. If it’s just one light fixture, there may be a loose or faulty bulb that needs replacing. However, if multiple lights are flickering, it’s likely an electrical issue. Start by checking the connections at the light switch and make sure they are secure. Loose connections can cause intermittent power flow and result in flickering lights. If everything looks good at the switch, it might be worth investigating the wiring within the walls or ceiling. Sometimes, worn-out or damaged wires can cause inconsistent power supply to the lights. In this case, calling an electrician would be your best bet for a safe and efficient resolution to your flickering light dilemma in your master bath.
- To replace a wafer light first things first, make sure the power is off before doing anything – safety first, right? Next, grab a ladder or step stool and position it under the wafer light. Gently remove the cover by unscrewing any screws or releasing any clips holding it in place. Now, take note of the type of bulb used in your wafer light – it could be fluorescent or LED. In either case, carefully remove the old bulb by twisting it counterclockwise until it comes loose. Be cautious not to break it as you could end up with shards all over the floor – not fun to clean up! Once removed, simply insert the new bulb by twisting it clockwise until snugly fit. Finally, replace the cover and secure it back into position. Voila! Your wafer light is good to go again and ready to bring back that bright and welcoming ambience to your space.
- An arc fault occurs when electricity jumps from a conductor and creates an electrical discharge. This can happen when there’s a faulty or loose connection in your wiring system. To troubleshoot this problem, you’ll need to check all the outlets and switches in your living room for any signs of damage or loose connections. If everything looks fine, it could be helpful to unplug all the devices on that circuit and gradually plug them back in one by one to see if any particular device is causing the issue. In some cases, resetting the AFCI (Arc Fault Circuit Interrupter) breaker at your electrical panel may also do the trick. If these DIY troubleshooting steps don’t solve the problem, it’s best to call a licensed electrician who can conduct a thorough inspection and fix the issue safely.
For all your residential, commercial & industrial needs
