First, another 5-star review from Melbourne.
Reason for call: The customer had fluorescent bulbs in the kitchen and a Handyman took the bulbs out of the ballast replacing them with plug-and-play led bulbs. Since the replacement, she has not been able to turn the lights on with the light switch.
Our Solution: We removed the existing ballast and rewired the fixture so that a ballast would no longer be needed. Installed LED bulbs that do not require a ballast.
Review: “Called Cornelius Electric for repair of kitchen light. Early repair time was scheduled and Chad showed up on time, was courteous and very knowledgeable on the topic. The issue was the ballast was bad. Decided to have the ballast removed, rewired, and have the light become LED capable. Thankfully Chad had the necessary bulbs so no extra trip to HD/Lowes for me. I would again ask Cornelius Electric to do any needed electrical repairs for my home. The price was reasonable for the work requested. Thank you Cornelius Electric and Chad for your excellent service! – Joyce Porzel
Call us 321-674-9667
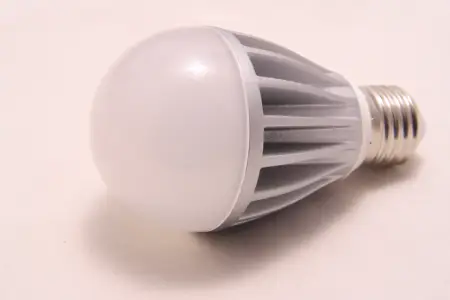
Replacing Fluorescent Kitchen Light with LED Bulbs
1. Introduction
Welcome to the wonderful world of LED lighting! If you’re tired of dealing with flickering fluorescent lights in your kitchen and want to upgrade to a more efficient and reliable option, then you’re in the right place. In this article, we’ll explore the benefits of switching from fluorescent lighting to LED bulbs in your kitchen. So, let’s shed some light on this illuminating topic!
2. Understanding Fluorescent Lighting in the Kitchen
2.1 How Fluorescent Lighting Works
Fluorescent lighting is a popular choice for kitchens due to its bright output. It operates using a tube filled with a mix of gases and a phosphor coating that emits light when electrically charged. The light produced by fluorescent bulbs is widespread and evenly distributed, making it great for illuminating larger areas.
2.2 Pros and Cons of Fluorescent Lighting
While fluorescent lighting has its advantages, like cost-effectiveness and availability in different sizes, it also has its drawbacks. One of the most common complaints is the annoying flickering that can happen, particularly as the bulbs get older. Additionally, fluorescent lights contain a small amount of mercury, which can be harmful if not disposed of properly.
3. Advantages of LED Bulbs over Fluorescent Lighting
3.1 Energy Efficiency
When it comes to energy efficiency, LED bulbs take the crown. LED lighting uses significantly less electricity than fluorescent bulbs, helping you save money on your energy bills in the long run. They are also more environmentally friendly, emitting less carbon dioxide during their lifespan.
3.2 Longevity
LED bulbs have an impressively long lifespan compared to fluorescent lights. While fluorescent bulbs typically last around 10,000 to 15,000 hours, LED bulbs can shine on for 50,000 hours or more. This means fewer bulb replacements and less hassle for you.
3.3 Improved Lighting Quality
LED bulbs offer superior lighting quality compared to fluorescent lights. They provide instant, flicker-free illumination and are available in various color temperatures, allowing you to customize your kitchen’s ambiance. LED lighting also offers better color rendering, making your food and kitchen decor look more vibrant and appealing.
4. Factors to Consider before Replacing Fluorescent Kitchen Lights with LED Bulbs
4.1 Assessing the Existing Lighting Setup
Before making the switch, it’s essential to evaluate your current fluorescent lighting setup. Consider factors like the number and size of fixtures, the type of ballast used, and the wiring in your kitchen. This assessment will help you determine the best approach and ensure compatibility with LED bulbs.
4.2 Compatibility and Retrofitting
LED bulbs come in different shapes and sizes, so it’s crucial to check if they are compatible with your existing fixtures. In some cases, you might need to retrofit or replace the fixtures to accommodate LED bulbs. Consulting a professional electrician can help you navigate this process smoothly.
4.3 Cost Considerations
While LED bulbs may initially seem more expensive than fluorescent lights, their longer lifespan and energy efficiency make them a wise investment in the long term. Calculate the potential energy savings and weigh them against the upfront costs to make an informed decision.
There you have it! Armed with the knowledge of LED’s superior energy efficiency, longevity, and improved lighting quality, you’re ready to make the switch from fluorescent lighting to LED bulbs in your kitchen. Say goodbye to flickering and hello to a brighter, more efficient space!
5. Step-by-Step Guide to Replacing Fluorescent Lights with LED Bulbs
5.1 Preparations and Safety Measures
Before embarking on your fluorescent to LED conversion journey, it’s important to take some necessary precautions and gather your supplies. First, make sure to switch off the power to the fluorescent fixture from your electrical panel. You don’t want any unexpected light shows or dance moves during the process!
Next, gather your tools: a ladder or step stool, a screwdriver set, wire strippers, and some electrical tape. Safety glasses are always a fashionable addition when dealing with electrical work, so don’t forget those!
5.2 Removing the Fluorescent Fixture
Now that you’re properly equipped, it’s time to bid farewell to your fluorescent fixture. Start by carefully removing the cover, usually held in place by a few screws. Take a moment to admire the dust bunnies and surprise spider webs hiding up there. It’s like an unexpected bonus with every fixture removal!
Once the cover is off, you’ll see the fluorescent tubes resting in their sockets. Twist the tubes gently to remove them, just like you’re opening a stubborn jar of pickles. Go easy, though – they might be fragile, and you don’t want to end up with broken glass everywhere.
With the tubes gone, it’s time to unscrew the fixture from the ceiling or wall. Keep an eye on the wires while doing this, so you don’t accidentally yank them out and have a real lightbulb moment.
5.3 Wiring and Installing the LED Bulbs
Congratulations, you’ve made it this far! Now it’s time to bring some LED magic into your kitchen. Look at your LED bulbs and, if needed, remove any additional packaging or protective caps.
Take one of the bulbs, align the pins with the sockets, and gently push it in. It should slide right in like a perfectly fitted puzzle piece. If it doesn’t, check your alignment and try again. Repeat this step for any additional bulbs you have.
Now, it’s time to wire the LED bulbs to your electrical setup. Match the colors of the wires: black with black, white with white, and green with green (or any other color your ground wire might be). Use your wire strippers to expose a small section of the wire, twist the matching color wires together, and secure them with wire nuts. Wrap some electrical tape around the wire nuts to keep everything nice and tidy.
Finally, screw the new LED fixture back into place on the ceiling or wall. Stand back and bask in the glory of your newfound LED illumination. You did it!
6. Tips for Choosing the Right LED Bulbs for Your Kitchen
6.1 Understanding LED Bulb Specifications
LED bulb shopping can sometimes feel like deciphering a secret code, but fear not! Let’s unravel the mysteries together. Pay attention to specifications like lumens (brightness), wattage (power consumption), and beam angle (light spread). Understanding these specs will help you find the perfect bulb for your kitchen.
6.2 Color Temperature and CRI
Choosing the right color temperature is like selecting the perfect mood lighting for your kitchen. Cooler temperatures (5000K-6000K) mimic bright daylight, while warmer temperatures (2700K-3000K) create a cozy and inviting atmosphere. Also, keep an eye out for the Color Rendering Index (CRI) – a higher CRI means truer colors will be showcased under the light.
6.3 Dimming and Compatibility
If you enjoy playing with light levels to set the mood, look for dimmable LED bulbs. Not all LEDs are dimmable, so double-check the packaging or product description. Additionally, ensure the bulbs you choose are compatible with your existing switches or dimmer controls. No one wants a disco party happening every time they try to dim the lights!
7. Cost Analysis: Comparing Fluorescent Lighting and LED Bulbs
7.1 Initial Investment and Payback Period
Now let’s get down to the nitty-gritty – the cost analysis. LED bulbs might have a higher price tag upfront compared to fluorescent ones, but fear not, dear budget-conscious reader! LED bulbs have a longer lifespan and lower energy consumption, resulting in savings over time.
To calculate the payback period, simply divide the upfront cost of the LED bulbs by the energy savings per month. And voila, you’ll know when your LED bulbs will have paid for themselves, like a smart investment that keeps on giving!
7.2 Long-Term Cost Savings
LED bulbs are like financial wizards, turning your energy savings into long-term cost savings. Due to their energy efficiency, LED bulbs can reduce your electricity bill and decrease the frequency of bulb replacements. It’s a win-win situation: you save money and Mother Earth gives you a high five!
